Seriously though, it's super simple to make a tutu once you know how and I'm going to add my own to the many, many tutorials out there. You don't have to do any sewing at all if you don't want to, it's that easy. Here goes!
What to buy;
First you will need to acquire elastic or ribbon for a waistband and enough tulle in your selected colours. How much tulle you will need depends on the size of the recipient and how fluffy you would like the tutu to be. For a small child you will need approximately 2-3m of tulle, for an adult sized tutu you will need 6-8m of it. Tulle usually comes in 54 inch or 60 inch widths, which is spot on for an adult tutu; for a child's tutu I would cut the tulle so it is half as wide.
I like to use at least two colours. Having a couple of similar coulours and a contrasting one adds nice depth to the tutu
Preparation;
You will need to cut the tulle into 2-3 inch wide strips. the narrower the strips the fluffier the tutu will be but if you cut the strips less than 2 inches wide it won't really make a difference other than being more time consuming.
If you are using elastic as a waistband fasten it in a circle so that it fits snugly around the waist, stretching only very slightly. You can knot it or sew it just make sure it is securely fastened and will not come undone. If you use ribbon as a waistband mark the waist measurement lightly on the ribbon so you know what size you are aiming for (this could be by tying a bit of thread around it in two places) making sure you have a reasonable length on either end for tying the tutu on. tie in a bow just beyond the marks.
I usually find the best place to put the waistband while I am attaching the strips of tulle is on the legs of a chair that is resting upside-down on another chair. A chair back will also do - the waistband needs to be held slightly taut.
Assembling the tutu
Hold one strip of tulle in the middle, with the ends together.
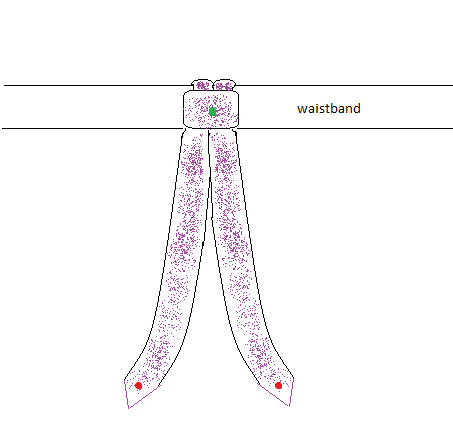
Fold the middle of the tulle over & behind the waistband.
Thread both ends through the loop formed by the middle of the strip.
Pull the ends until the loop is tight around the waistband.
This sounds more complicated than it is - it's really simple - so I've made a couple of (very!) simple diagrams to clarify what I mean - the movement of the middle of the tulle is shown by green & the ends by red.....

& this is the strip pulled tight;

Repeat these steps with your different colours (try out different combinations of your colour choices over a smaller area until you are happy with your pattern) until the entire waistband is covered by knots of tulle. Then squash them together and add a few more strips! When it is finished the tutu should look something like this;

If you have used ribbon as a waistband knot the ends of the ribbon around the tulle knots at the very end so that they don't slip off and you are done; easy peasy!
have fun!
MINE!!! :D xxx
ReplyDelete